Written by Martine Couture, Crestars, with Ch Crestars Fantayzee Rompford PF as a model
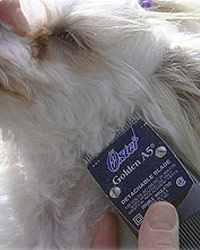
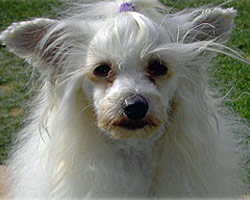 Here is my little Tayzee girl. She is shown here with a growth of 2 months. Note that she started to stain around her mouth and eyes. When autumn and winter time come this is normal for Tayzee to start doing this. In the spring and summer she does not stain. Here are the step by step pictures on how I shaved her face, ears, did her pads and her bum.
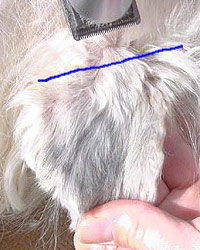
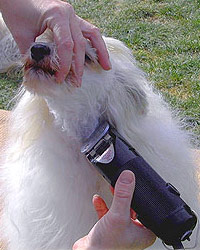 First using my clipper turned the other way around I mark my “V” neck shape. This way you can make a nice sharp straight V.
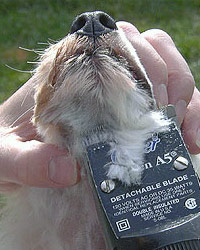
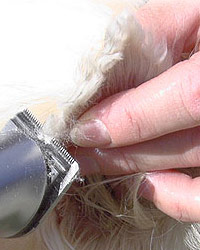
 Here is a close-up on how I start. Please remember that Tayzee is very well trained and she does not move around. A sudden jerk from an untrained dog could cause a serious injury with the blade pointing this way!
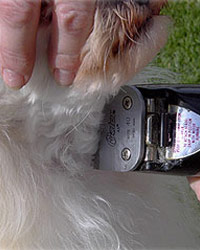
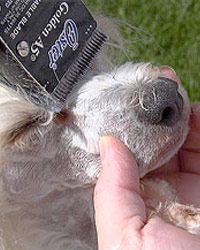
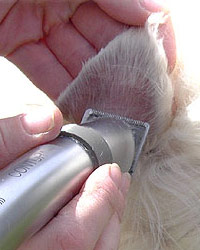
 Here is a close-up of the “V” shape. The bottom right hair of the V is short due to a little bump which was removed about 6 weeks ago…which proved to be a fat deposit thank goodness.
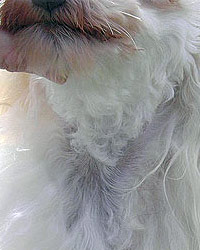
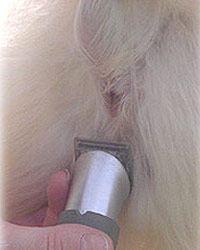
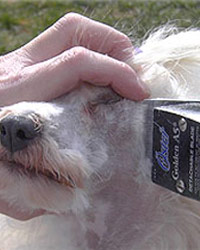 Once I have establish my “V” shape I start shaving against the hair grain. Please note that I never let the face hair grow this much. I left it grow for to show a visible difference for the pictures purpose…
I hold and stretch her eye to make sure all the hair below the eye lid is been shaved off.
 Here close to the corner of the eyes I go with the hair grain first. When I finish up I go against it.
 Then I keep on going with the other side. Note that i do not clip the hair all the way back to the ear. I leave a little in front of it. I find it looks too “empty” when it is clipped too far back.
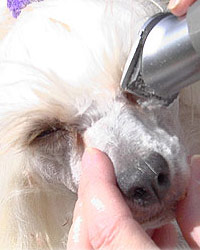
 And here I finish by clipping under the muzzle and on top of the nose.
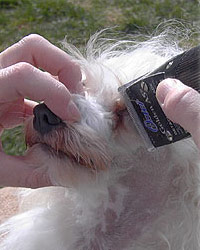
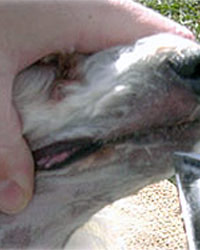 Above I stretch the mouth so I can get this little spot where there’s a little fold and there’s always seem to have a little hair left behind.
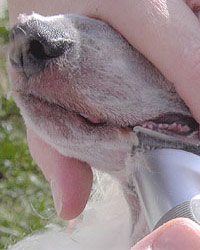
 Then I take my little clipper and I do the finishing touch with it. I finish under the eyes by going against the hair grain and basically do an overall clip to give it an even closer cut and a more even cut. Most of the time because I keep up with clipping their face this is the only clipper I use as the hair is never really long.
 Now here comes the ear shaving. Remember that this is a personal preference also.
I start by taking the hair off the outside of the ear along the hair grain. I cut in an angle. I start right at the bottom of the top part of the base of the ear and I go in angle to not go lower than the “nick” of the ear. You will see later on why I like to do this.
 Notice that I keep the ear flat.
 Then I do the edge of the ear followed by the inside of the ear.
 Viewed from the top this is what it looks like.
 From the side this is what it looks like…note that the hair has been left to grow from the “nick” down…this produce a much fuller look.
 Here I finish against the hair growth. Be very careful at this point. Sharp blades are a must! And again I will remind you that Tayzee is a well trained dog and she does not move for this operation. I would of not attempted to do this when I first started to clip her ears at an early age.
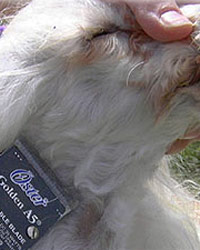
 When I’m done my ears, I have a last check at my face and may just touch it up as shown on the right.
 An important step before you continue on is too brush the fine clippings on the hair. For some reason if forgotten on the dogs it just makes a ball in the hair and becomes an instant mat!
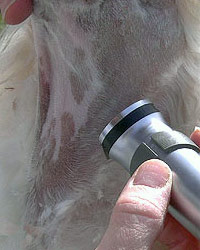
 At an early age start cleaning around your dog’s anus. Especially at puppy stage where they start eating on their own and the mom are not as keen on cleaning after them. At adult age this is just a routine.
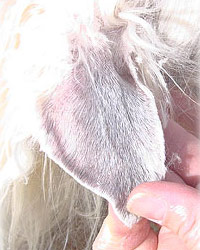
 Another routine is to get them used to have their pads handled. Your dog’s pads should be clean at all time for better traction in the summer time and to prevent ice ball formation in the winter time. You may choose to remove the pads’ hair with your clipper or with a good pair of scissors.
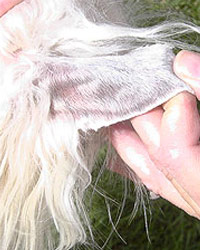
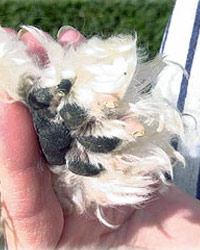 This is what the pads should look like. After this photo session Tayzee also had her toe nails cut. I trim the nails every week.
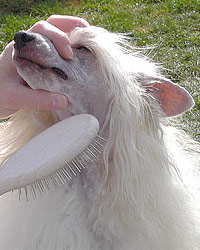
 And here is the final result…I think she is much happier!